How to choose between a NPN or PNP transistor? (For beginners)
Many articles I read to research this topic went into minute details about how NPN and PNP transistors are made, but didn’t seem to answer my question: Why should I use one and not the other?
![]()
This article aims to answer this question in a way that I can understand and focuses only on switching. I’m also going to purposely avoid talking about silicon in this post. Warning: I’m a beginner and am only covering basic switching.
What are BJT Transistors?
NPN and PNP transistors are types of Bipolar Junction Transistors. All BJT transistors are current driven, meaning they depend on the current (amps) passing through them to open and close the switch. (MOSFETs are voltage driven transistors, but we won’t discuss them here.)
Here is a circuit diagram of the two types:
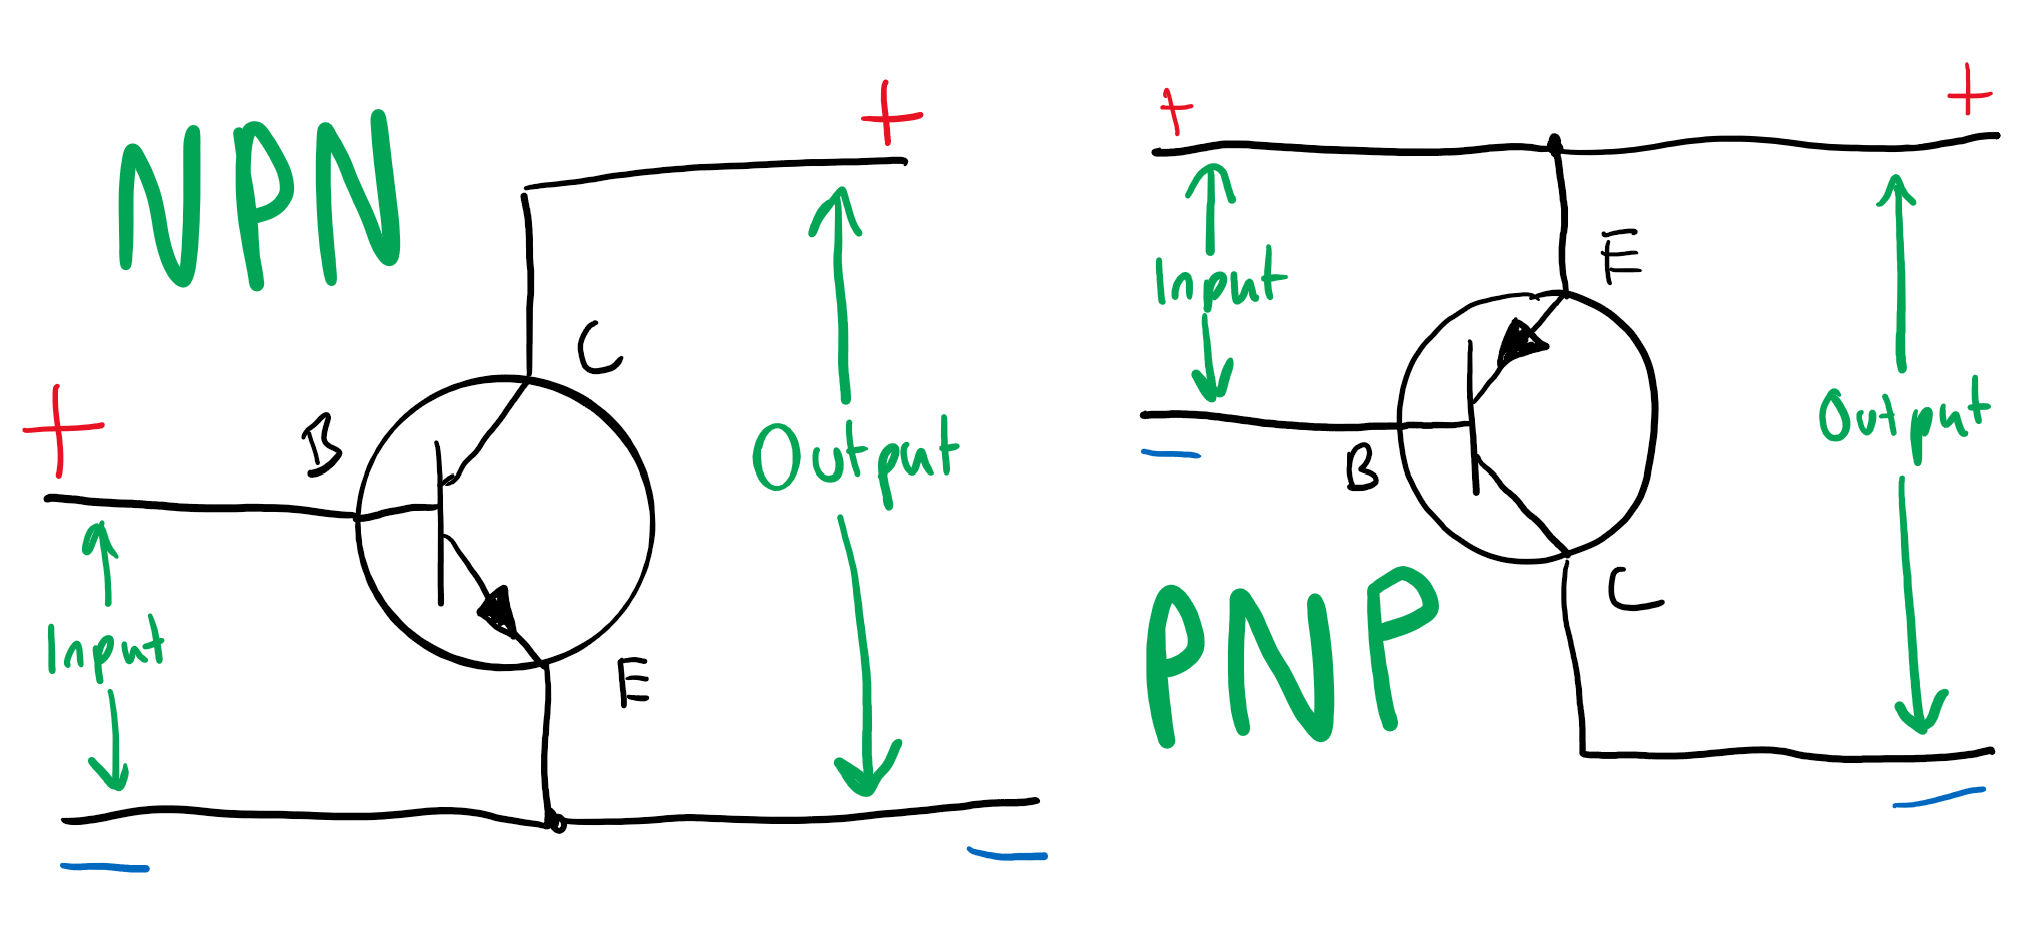 The arrows point the direction of current in a PN junction. Notice the collector and emitter have moved.
As you can see, the NPN transistors are controlled by a positive voltage on the base, and PNP transistors are controlled by a negative voltage on the base.
As mentioned above, the transistor requires current flowing through the base for control. Unfortunately, for us software developers, the real world isn’t binary. As current ramps up at the transistor’s base, it’s like opening a tap. With no current (tap closed), no current passes between the collector and the emitter. As you start adding current to the base (opening the tap), the current passing between the collector and the emitter increases (more water comes out). At a certain point, voltage becomes the limiting factor, and supplying more current to the base (opening the tap more) won’t increase the flow between the collector and the emitter (no more water comes out). At this final stage, the transistor is said to be saturated.
Understanding these facts led me to think of transistors as variable resistors that you can turn up and down.
How to choose between NPN and PNP transistors?
For switching applications, you should use NPN for a low-side switch or PNP for a high-side switch. Using the other will cause issues such as excessive current draw (and even more complex issues, I’ve been told) because you’ll need current flowing in odd directions through the transistor.
That sentence is as deep as I currently understand, and it makes sense. It seems that using the correct tool for the job reduces current draw, allowing your circuit to maintain a happy, low-current lifestyle.
That’s a pathetic answer; I want more detail!
Using this great page, you can see that there are a number of advantages such as faster speed, lower cost, lower resistance, and the ability to connect the grounds. (I’m not sure what “fast” means in this scenario or what would be considered slow. I’m guessing that compared to us humans, they’re going to be pretty fast either way.)
However, this caught my eye:
As a quick rule of thumb, if you are turning a device on and off, a low-side switch is a simple solution. However, if you are delivering power to an entire circuit or a voltage sensitive device, then you want to use a high-side switch.
The resistor
Just a note about the resistor that’s required when driving a transistor from a microcontroller.
Transistors can theoretically draw unlimited current via the base; in reality, they’ll cause a fire before that happens. Therefore, you need to reach saturation levels but not supply additional current, as it becomes waste.
You can do this with a resistor. Find your saturation current from the transistor datasheet, then use Ohm’s Law to calculate the required resistance (since you know the voltages you’re working with) and pick a resistor close to that value.
Special Thanks
I want to extend special thanks to Ross Bamford for helping a beginner get his head around some of these concepts. If you check out his website, you will also see the computer he has built.